Dying Easter Eggs Naturally with Non-Toxic Easter Egg Dye
As Easter approaches, many families look forward to the fun tradition of decorating eggs. While store-bought egg dye kits are convenient, they often contain harsh chemicals and artificial dyes. Fortunately, there are eco-friendly and non-toxic alternatives for dyeing Easter eggs naturally using ingredients found in your kitchen. In this blog post, we’ll explore non-toxic Easter egg dye options, decorating ideas, and how to incorporate healthy ingredients into your egg decorating process.
What you’ll need:
- 3-quart pot ($20, amazon.com)
- Strainer ($11, amazon.com)
- White vinegar ($2, amazon.com)
- Salt ($9, amazon.com)
- Disposable plastic gloves ($12, amazon.com)
- Dye color cups ($5, amazon.com)
Eco Friendly Easter Egg Ingredients
Dyeing Easter eggs naturally is not only safer for your family, but it’s also better for the environment. Here are some non-toxic foods that you can use to create beautiful, eco-friendly Easter egg dyes:
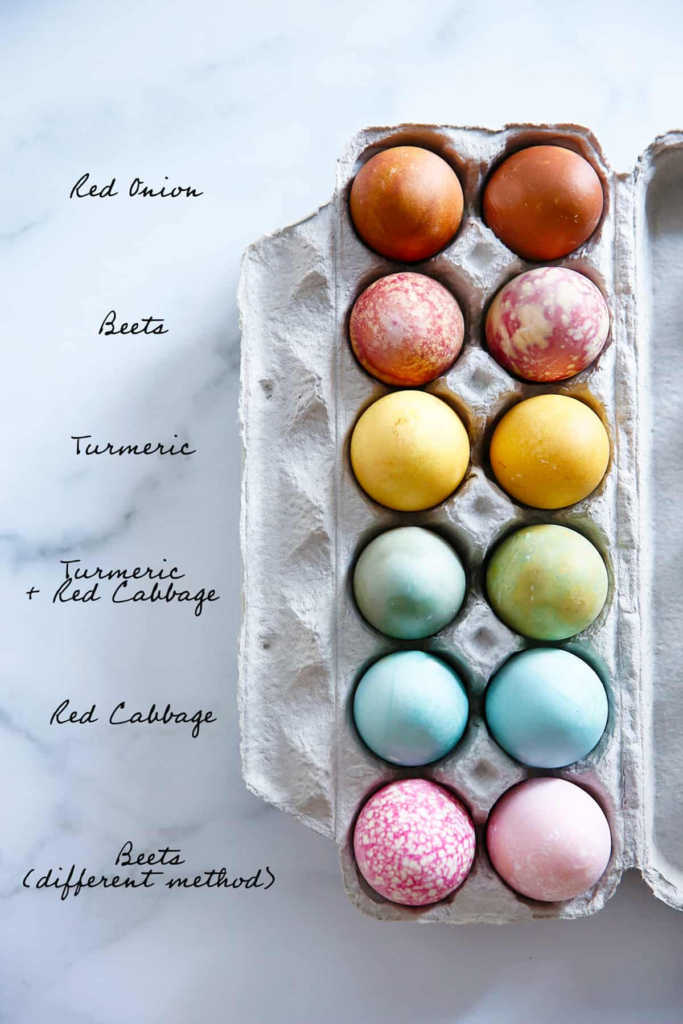
- Turmeric: This vibrant yellow spice can be used to create a bright and cheerful hue on your Easter eggs.
- Red Cabbage: Boil red cabbage to create a natural dye that produces shades of blue and purple on eggs.
- Beets: Boil beets to extract their deep red color, perfect for dyeing Easter eggs naturally.
- Spinach: Blend spinach with water to create a green dye that will give your eggs a lovely, earthy hue.
- Blueberries: Crushed blueberries can be used to create a rich purple dye for your Easter eggs.
These natural ingredients not only provide beautiful colors but also ensure that your Easter egg decorating is free from harmful chemicals.
Non-Toxic Easter Egg Dye

Dyeing Easter eggs naturally is not only safer for your family, but it’s also better for the environment. Here’s a step-by-step guide on how to make non-toxic Easter egg dye using common kitchen ingredients:
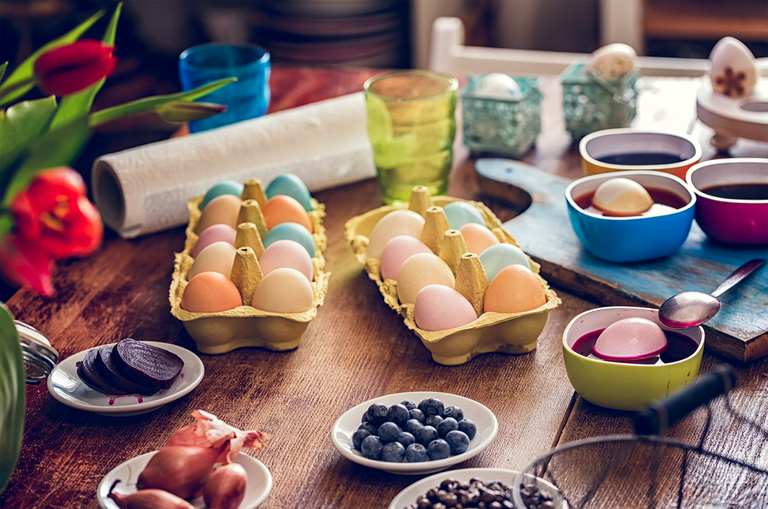
Ingredients:
- Turmeric
- Red Cabbage
- Beets
- Spinach
- Blueberries
- White vinegar
- Water
- Saucepan
- Strainer
- Mason jars or bowls
- Hard-boiled eggs
Instructions:
Follow these step-by-step instructions to create your own non-toxic easter egg dye!
Prepare the Ingredients:
Wash and chop the vegetables and fruits into small pieces. For every cup of chopped produce, you’ll need about 1 cup of water.
Make the Dye:
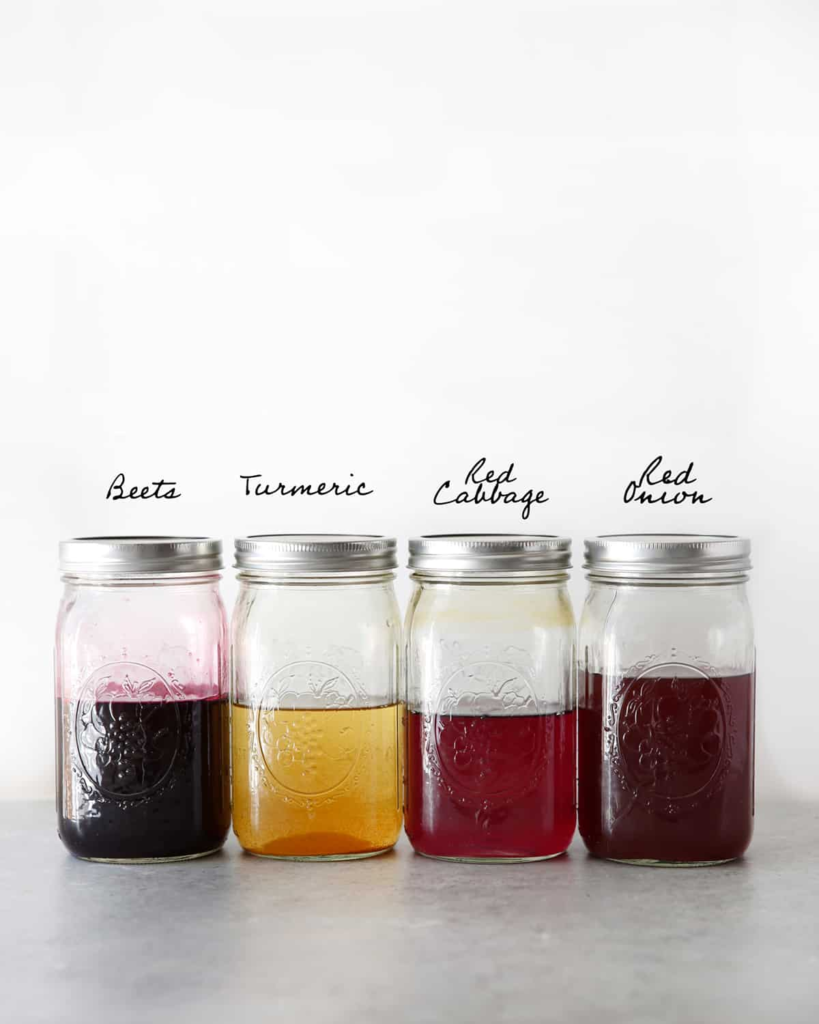
In separate saucepans, add each ingredient (turmeric, red cabbage, beets, spinach, blueberries) to water and bring to a boil. Reduce the heat and let simmer for about 15-20 minutes until the water has absorbed the color from the ingredients.
Strain the Dye:
Use a strainer to separate the liquid dye from the solid ingredients. Pour the strained liquid into mason jars or bowls, one for each color.
Add Vinegar:
For each cup of dye, add about 1 tablespoon of white vinegar. Vinegar helps the dye adhere to the eggshell and creates brighter colors.
Dye the Eggs:
Once the dye has cooled to room temperature, carefully lower hard-boiled eggs into the dye. The longer you leave the eggs in the dye, the deeper the color will be. For lighter shades, soak for a few minutes, and for darker colors, leave them in for up to an hour.
Remove and Dry:
Use a slotted spoon to remove the eggs from the dye and place them on a wire rack or paper towels to dry. Avoid touching the eggs until they are completely dry to prevent smudging.
Do You Have to Use Vinegar to Dye Eggs?
Absolutely! While the chemistry might be a bit overwhelming, the simple answer is that vinegar, specifically the acid found in white vinegar, is crucial for adjusting the pH level of the dye mixture. This adjustment is necessary for the dye to properly adhere to the surface of the eggshell.
For optimal results, aim for around one teaspoon of vinegar per cup of egg dye solution. However, don’t hesitate to experiment with different quantities to achieve various color effects.
Helpful Tips and Reminders
- Ensure that the eggs are fully immersed in the dye solution to guarantee uniform coloring.
- To prevent the eggs from becoming overcooked in the natural dye, refrigerate them while they soak.
- Avoid rubbing the eggs dry, as this could cause the color to smear. Instead, allow them to air dry naturally.
- Bear in mind that eggs stored after dyeing may undergo subtle color changes over time.
- For eggs that closely resemble their original hue, it’s best to dye them the day before Easter.
Both the boiled eggs and the dye solution should be cool during the dyeing process to prevent overcooking and ensure safety. Refrigerate the eggs in the dye solution overnight for optimal results.
Decorating Eco-Friendly Easter Eggs
Now that you’ve created your non-toxic Easter egg dyes, it’s time to get creative with decorating your eco-friendly Easter eggs. Here are some fun ideas to try:
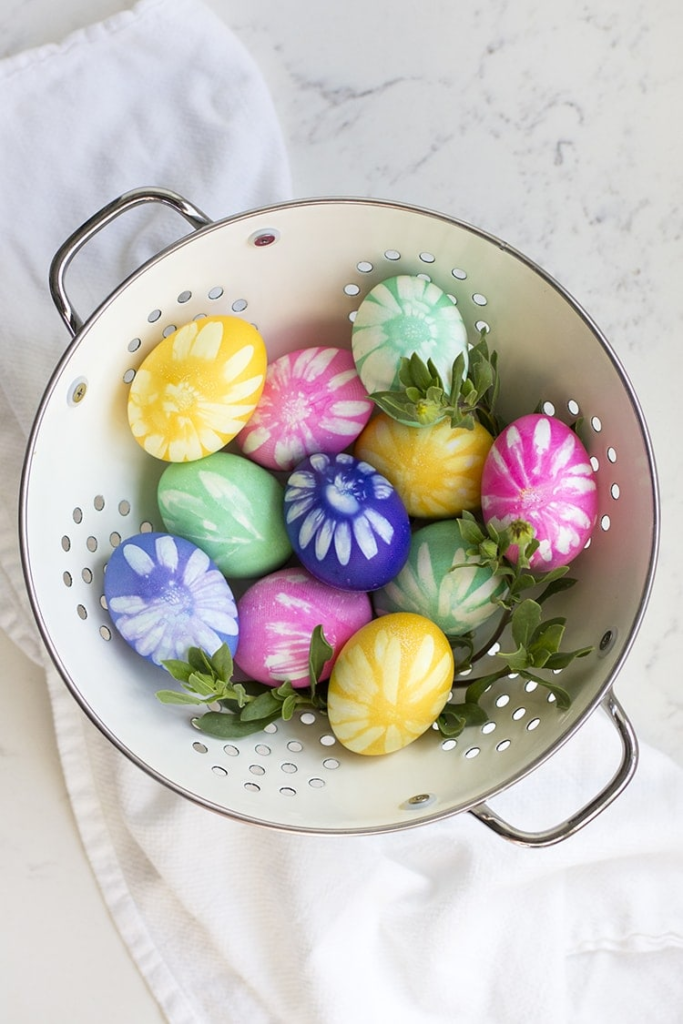
- Natural Patterns: Use leaves, flowers, or herbs to create intricate patterns on your eggs. Simply place the natural materials against the eggshell and secure them with a piece of pantyhose before dipping the eggs into the dye.
- Marbling: Create stunning marbled effects by dipping eggs into multiple colors of dye or swirling different colored dyes together.
- Wax Resist: Use a wax crayon or beeswax to draw designs on the eggs before dipping them into the dye. The wax will resist the dye, creating unique patterns and designs.
- Decoupage: Cut out small pieces of colored tissue paper or napkins and use Mod Podge or a mixture of equal parts water and flour to adhere them to the eggs. This creates a beautiful, textured effect.
- Glitter Eggs: For a touch of sparkle, brush a thin layer of glue onto the dyed eggs and sprinkle with biodegradable glitter.
By incorporating these healthy ingredients into your Easter egg decorating, you can create beautiful, eco-friendly eggs that are safe for the whole family to enjoy.
This Easter, consider ditching the traditional egg dye kits in favor of eco-friendly and non-toxic alternatives. By using natural ingredients from your kitchen, you can create beautiful Easter eggs that are safe for your family and the environment. Get creative with decorating techniques and incorporate healthy ingredients for an Easter celebration that is both fun and nutritious.
Whether you’re marbling, decoupaging, or simply dipping eggs into natural dyes, embrace the joy of eco-friendly Easter egg decorating and create lasting memories with your loved ones. Happy Easter!

