How To Use Pinterest To Grow Your Website Traffic
Pinterest is a great way to drive traffic to your website. Unsure where to start?
I’ll take you step by step through getting started and setting yourself up for success! Pinterest represents a HUGE opportunity to blogs, e-commerce stores and any online business that thrives from traffic.
Over 335 million people use Pinterest every month and for many bloggers, Pinterest is one of their biggest traffic drivers. For me, personally, it is my number one traffic source and implementing these strategies tripled my website views in JUST TWO WEEKS!
As a new blogger, you probably keep hearing about Pinterest. You also probably keep hearing that you need to join Tailwind Tribes, and the word Canva probably keeps popping up too.
Let’s break down the exact Pinterest strategy using Canva and Tailwind, to start growing your blog traffic today!
STEP 1: GET A PINTEREST BUSINESS ACCOUNT
To use Pinterest for your blog, you need a Pinterest business account. Getting a business account for your blog is essential – firstly because Pinterest’s terms of services require anyone who uses Pinterest to promote a brand to use a business account. But also, because you get access to Pinterest analytics AND crucially, you get to claim your website (see below) if you have a business account.
TO CREATE A NEW BUSINESS ACCOUNT
- If you have a personal account, go to pinterest.com/logout to log out
- Go to pinterest.com/business/create/
- Fill out your email, password and business name then select a business type
- Click Create account
TO CONVERT A PERSONAL ACCOUNT TO A BUSINESS ACCOUNT
- Log in to your personal Pinterest account
- Go to pinterest.com/business/convert/
- Fill out your business name and website then select a business type
STEP 2: CLAIM YOUR WEBSITE
The next step in setting up your Pinterest business account is to claim your site.
To claim your website, click the three dots in the top right corner of your newly created (or newly converted) Pinterest business account and select ‘settings’.
From the menu on the left choose ‘claim’
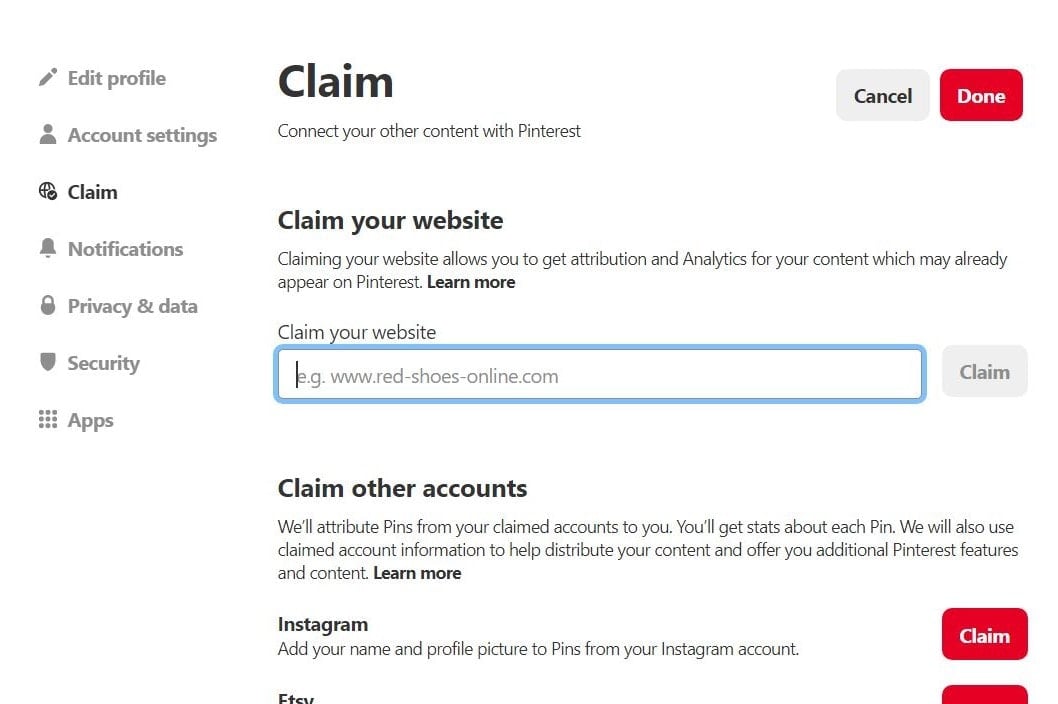
Type in your URL and then click ‘claim’.
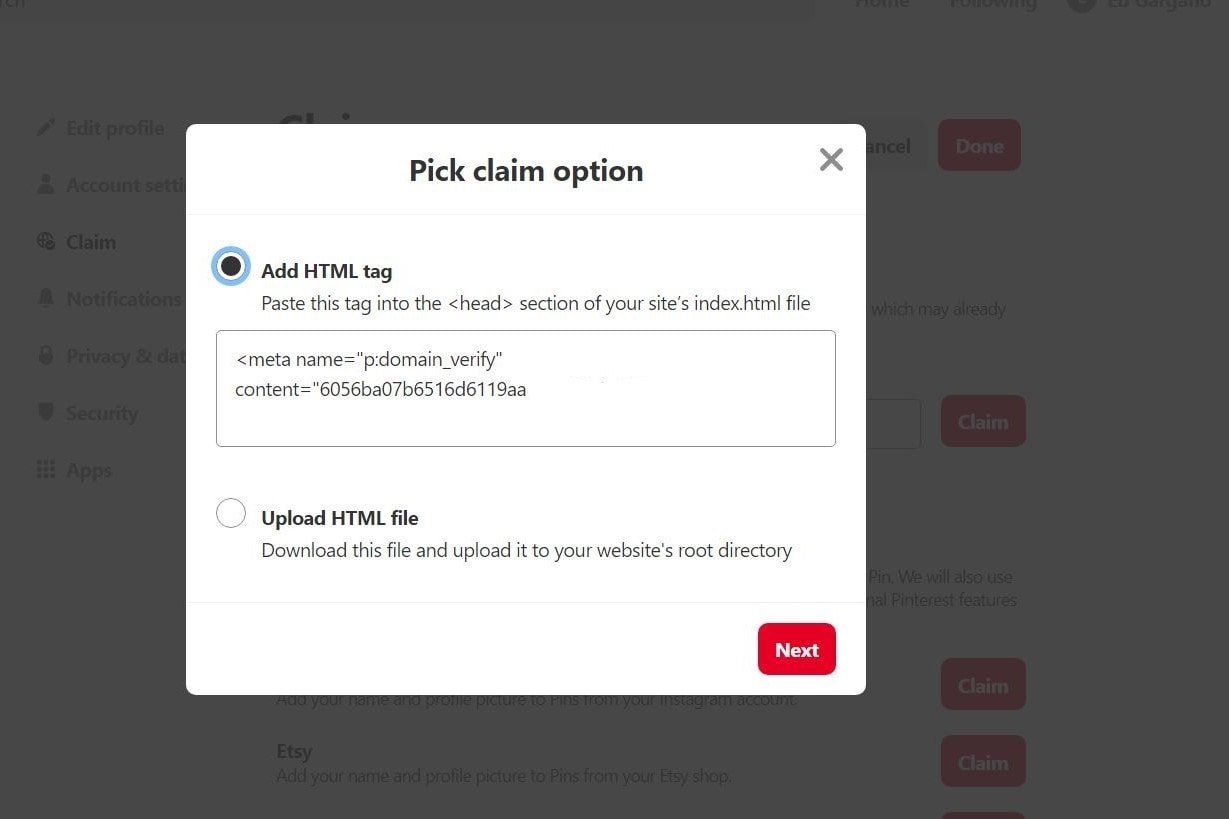
You will be prompted to pick a claim method.
Choose ‘add HTML tag’ and copy the HTML tag that pops up.
Step 3: CREATE PINTEREST PINS FOR YOUR BLOG USING Canva.
Most bloggers, e-commerce stores, and brands with any and all online presence tend to use Canva because it is really easy to use.
There is even a Pinterest Graphic Design feature- so you can literally create eye-catching pins with one click.
STEP 4: CREATE SOME BOARDS
Now you’re ready to create some Pinterest boards!Click the red plus sign where it says create board. Name your board and click ‘create’.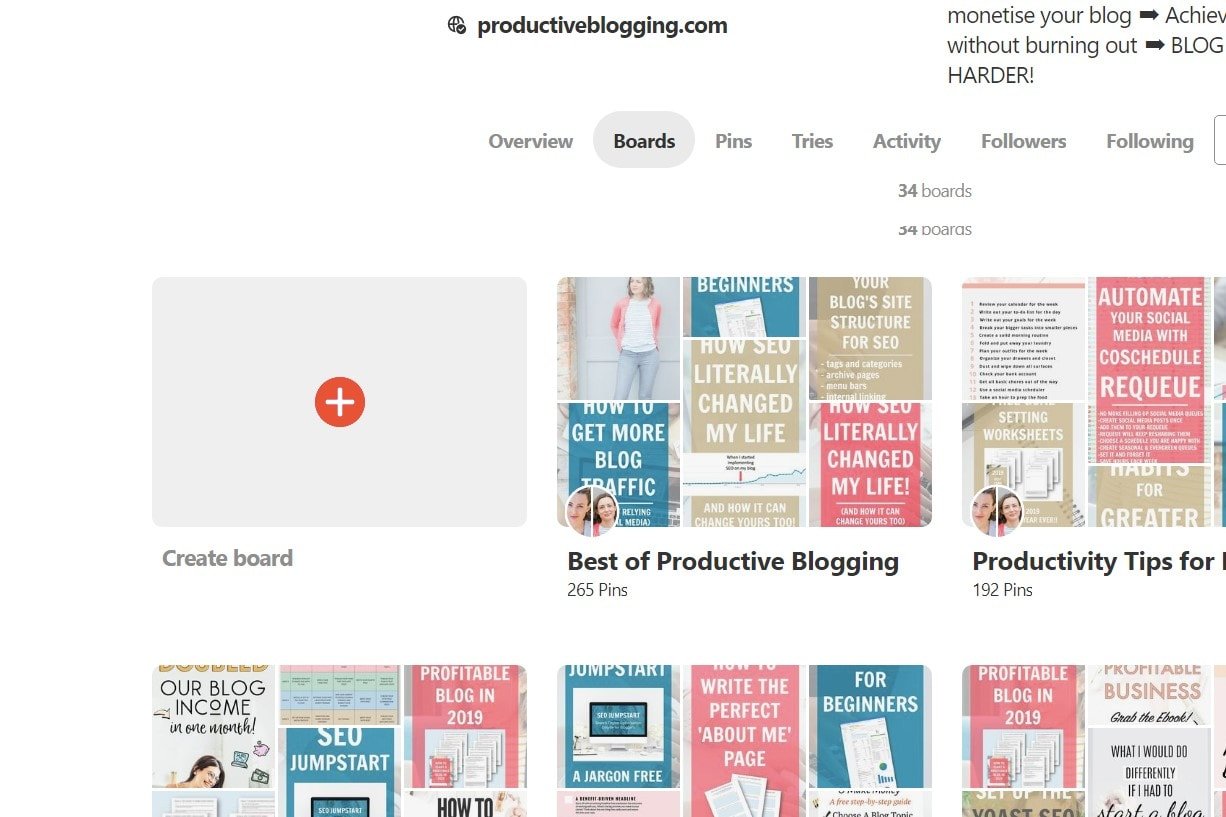
You should create a selection of boards for the main topics you cover on your blog.
For example, I have boards for “how to start a blog”, “blogging business”, “woman’s lifestyle”, “recipes”, and all the main categories on my blog.
Step 5: Start Using Tailwind
Tailwind has been a popular scheduling tool for Pinterest and bloggers for many years. It lets you bulk load pins which will schedule on the days and times you set. It means with some work, you can schedule your pins, and other peoples pins for the next few weeks, even months and during that time you don’t need to do anything as you did all the work when scheduling.
Tailwind Tribes are also popular, this is a way to get other people to pin your pins and in turn, you pin their pins. A bit like group boards on Pinterest directly.
1. You Can Schedule Your Pins
Using Tailwind can you save you a ton of time with the schedule pin feature. With this feature, you can schedule all the pins you would like at once. Tailwind has a browser extension tool which makes scheduling pins very easy to do. You can download it on Firefox, Google Chrome & Safari. With this extension, you can schedule your pins from any website which is super amazing.
I tend to do my scheduling for the week all in one day (On Mondays) and end up with about 7 different pins set and ready to go. Keeping my Tailwind Queue full for the week has been one of the best ways for growth on my Pinterest page and blog.
2. Best Time To Pin Feature
After you connect your Pinterest account to your Tailwind account, Tailwind automatically optimizes your pinning schedule to when your followers are most active. This feature sets up the best times to schedule your pins base on your followers. You can also add your own custom times to pin as well. This feature has been super helpful for me because I discover the best times to pin for my niche (Followers) is between 7 pm to 10 pm daily.
3. Data and Analysis Feature
With this feature, you can see how well your pins are doing on your boards and other group boards. You can also see which pins are performing the best, the comments received on each pin, what time your popular pins were repinned, & more. Basically, you can see what works and what doesn’t work to get the most of out of each pin.
Tailwind is free for your first 100 scheduled pins, so its worth signing up and testing it out. After that, it will cost you a minimum of $9.99 a month for unlimited scheduled pins and you can cancel at any time which is handy.

This is what Tailwind says about using it for Pinterest!
Join Tailwind Tribes
Group boards play a huge factor if you want to grow your blog through Pinterest, but I personally found even more success utilizing Tailwind Tribes (Communities).
Previously known as Tailwind Tribes, Communities give you an opportunity to share your pins with other Pinterest users who are in the same niche as you.
You share theirs, and they share yours! Which means they will share your pins to their followers, too.
When you add your pins to the Communities, these pinners can publish your pins to their own accounts, sharing your blog content with their followers.
Look at these stats!

HERE’S THE TAILWIND LINK TO GET YOU STARTED WITH YOUR FREE TRIAL.
Once you set up Tailwind, they have an instructional video which shows you how to schedule pins and how to get around their website.
As with every aspect of blogging, you’ll want to focus on SEO with Pinterest, too. Remember it’s a search engine above anything else!
Haven’t started a blog yet? Start here!
Already a blogger and want to start creating better viral pins? Use my free templates!
Start Making Money As A Blogger Today: A Beginners Guide To Your First $1,000 With Affiliate Marketing!
Claim your free Canva templates!
Subscribe to have them delivered straight to your inbox!!


Excellent content ! Thank you
Great post!
I have seen exponential growth on my Pinterest account, but I want to step up my game even more. I definitely need to start using Tailwind.
It makes all the difference!! Let me know if you do and I’ll add you to some tribes 🙂